To dye with, your indigo will still need further help.
You must remove the O2 from the compound, so that it will bond to your fiber. This is called “reduction” and it converts the indigo into "white indigo" (leuco-indigo) which is actually green. In this reduced green state it will bond to natural fibers only and once exposed to oxygen again, it will turn blue. To reduce you must have a perfectly balanced vat of indigo, alkaline, and reducing agent.
There are many combinations that people throughout time have figured out how to do this. Henna powder, Ferrous Sulfate (Iron) or Fructose (sugars from ripened fruits) are just three ways to reduce, and Calcium Hydroxide (Lime) is one alkaline to use.
CREATING YOUR VAT
*Always wear a dust mask or at least a bandana when mixing your powders. Lime is alkaline and can be an irritant to your eyes, nose and throat. Please use with caution.
*I use tap water (sitting out to air) here in NYC and haven’t had any issues. But many will use distilled or collected rainwater to avoid having any additives getting in the way. Especially if you have hard water.
VAT DIRECT METHOD
WASHING
Rinse in cold water to remove a good amount of indigo.
Fabric should then be soaked in white vinegar bath for 15-30 minutes, to deactivate the reducing agent and it also helps set or “fix” the indigo. (1 cup per gallon bucket)
Soak in hot water for at least one hour or overnight.
Wash in hot water and mild detergent like dove or dr. bronners, but synthrapol is highly recommended. It helps with dye bleeding by suspending dye particles. Rinse in cold water.
During the life of your piece, continue to wash your piece in cold water and avoid intense, direct sunlight.
TENDING
Vats can be kept for years if used daily, and cared for. You shouldn’t store a vat for more than 6 months unused. Stored vats can be brought back up to temperature and then pH tested and adjusted with reducing agent and alkaline. There is a finite amount of indigo in your vat, and it needs to be added the more you dye. You will notice your blues will become lighter the more you dye with it.
DISPOSAL
Keep your vat as long as you can, but when ready you should neutralize before pouring down the drain. Adding vinegar will do the trick but also whisking vat to add air, turning the lime into calcium carbonate aka chalk/limestone, will make it safe enough to compost.
All natural dyers have to find their own way to a routine. The more you dye and work through issues, the closer you are to finding that rhythm. Most importantly, have fun!
]]>
A quick overview of the dyeing process using Marigold Dye;
1. Scour
2. Mordant (a more thorough explanation here.)
(WOF = Weight Of Fiber)
Recommended for protein fibers (silk/wool)
Aluminum Sulfate 12% WOF
with cream of tartar 6% WOF
At 180*F hold 45min
Recommended for cellulose fibers (cotton/hemp/linen)
ALUMINUM ACETATE 5-10% WOF
At 110*F hold 45min- soak overnight for maximum hold
Immediate bath of 5% WOF Bran/Chalk
Hold 30min do not rinse, go straight to dye bath
3. Create Dye Bath
4. Hold at temperature for 30-60 min, then let sit to cool or overnight.
Marigolds: add alkaline for orangey ton, add iron for green.
5. Rinse well in hot water and synthrapol (or pH balanced soap), wash again in warm water, rinse in cold water.
A naturally dyed piece does best long term when washed in cold water with sensitive soap that is pH balanced and line dried, but out of the sun, to protect from UV light fading it.
(Special thanks to Sayaka of Curious Corners for the blog's picture. She grabbed some marigold dye from me and dyed that lovely top!)
]]>I've been shibori stitching small squares of scrap linen pieces as habit/meditation/boredom.
My 35 gallon indigo vat is a iron reduction style. The heavy sediment gathers at the bottom, so before you dip anything you have to give it a good stir. If you listen you can hear marbles swirling around. They are used to "hydrate" the indigo during the creation of the vat, but I leave them in the bottom to help unearth that sediment. Plus it sounds wonderful and relaxing.
After the big stir, a flower forms. Before you dip you remove the flower so it doesn't get in the way and leave spots on your fabrics.
Presoaked fabrics are wrung out to remove excess water, carefully dipped in the vat and messaged for 30sec-5min depending on the life of the vat and desired depth of blue wanted. Each piece is lifted out to avoid splashing, wrung out to remove excess dye in collection pan, then it's washed in cool water to remove the grim. The iron from the vat, if not removed, can makes marks on the piece as it oxidizes. It also shows a more true color that you achieve though being wet, it appears darker than it is.
To achieve darker shades, you repeat the dipping/rinsing process. These tiny pieces are for a larger patchwork blanket piece. Once I thoroughly message each piece individually and check that the indigo penetrated the pattern I've sewn, I then place in a basket I made from to pasta strainers, and dip a few at a time to save time. With stitched pieces you don't really want to over massage and lose the detail either. It's tricky to dip to avoid introducing oxygen through bubbles, so it must be dip very slowly and moved cautiously.
Hope you enjoyed and found useful in your own practice! Try out your own small vat at home with my Indigo kits, available in 3 reduction styles using iron, henna, or fructose.
]]>Yeah! Snow Day!
Step 1, Wash your fabric. Essential, especially with heavier weight fabrics. You can leave it damp but wring out as much liquid as you can. If you're prepping ahead of time, and your fabric is dry, it can go into the soda ash that way, but leave soaking a bit longer so it has time to saturate.
Soak in soda ash. Now you always need to "activate" reactive dyes, but with each process you choose before, during, or after. I have gotten into doing it before hand, however I'll add at the end of this a few other options top play around with. The results will be slightly different for each variation.
Mix up a Soda Ash Soak Solution of 1 cup per gallon of warm water. The more items you need to soak, the more water you'll need. I also, for this particular process, will add more soda ash, say an extra cup. Soak fabric 10 minutes minimum with occasional stirring. Thicker fabrics will require longer than sheer. If I know I will have fresh snow in the morning, I will soak my fabric over night. Basically when the forecast says they're will be a snow dump, I start soaking.
While wearing rubber gloves, wring out the fabric well and do not rinse. (This Soak Solution keeps for a long time at room temperature in a closed container and can be reused to soak more fabric. So don't throw away. You'll probably want to dye again when you see the results!)
Set up a dye area where you can lay your fabric above and collect the dye that drips below. I have seen other dyers placing items in a bucket, fabric/snow/dye. I find without having a space below to catch the dye and keep it separate from the fiber, the pieces get very muddy looking.
But like I said before, every variation yields different results. Find the way that works for you!
I put these old shelving racks over tupperware so I can do a handful of pieces at a time. Other examples might be a cooling rack over a bin or placing a couple of bricks in your bucket. Anything that will raise the fabric off the bottom.
Lay out your fabric so it's not folded on itself and as even as you can make it, so the color ends up evenly dispersed.
Gather and get ready! Once you grab the snow times ticking. You should have gloves (both warm and rubber) and mask on. Never work with these dyes without a mask on. As stated in previous post, breathing in these powders can cause respiratory issues. Especially the way I'm showing you how to do this.
Gather a good amount of clean (enough) snow! Having the warm gloves will help here and later.
Pick 2-3 colors of fiber reactive dyes, being aware of the color chart. Choosing more than that I find is over kill, and often results in just brown, but to each there own.
Also be aware that some colors are less saturated and vibrant than others, and don't work as well at lower temperatures. For instance black does better when you raise the temperature, so often you'll just get grey here. Ice blue is very light and will be over powered by other colors. Then all these colors are basically mixtures of base colors, so you will see particles of many colors with this method I'm showing you.
Now I add the color right to the fabric. (I'll mention other options at the end) It is very very easy to go overboard here and be left with a mess. I use paint brushes to grab a tiny bit of powder and tap it over the piece. A little goes a long way, and I can not stress enough how important it is to wear a mask.
You'll now pile the snow up!
Pack it on carefully, sensing the way it will melt and fall so you don't waste any.
The speed of the snow melting matters. My studio is pretty cold, which means it takes a little longer to melt. I feel pretty lucky that the snow will last the day or overnight. Too quickly and the colors don't blend enough. It needs a minimum of 1 hour to activate and often the colors aren't as vibrant. There's also issue if they don't melt at all. This dye once activated by the soda ash is limited to working for 24 hours only. If working outside, make sure it's warm enough for the snow to actually melt :-). Experiment with all this in mind.
Once melted. It will look unimpressive. Don't worry!
Rinse lightly in cold water carefully. I rinse the three color themes separately. But if your soda ash ratio was proper, you really shouldn't see much bleeding.
Then wash in hot bath of synthrapol. This special washing agent isolates dye particles are further reduces any bleeding and color running you may see.
A soak in fiber fix solution, also called retayne, is very helpful and reduces washing/water used.
Then a final rinse.
Then end results are so satisfying! Even when dry the colors really explode!
Now to PRINT!
I chose to print my coneflower block on these guys. Check them out!
Some other options with adding color:
Add the snow atop the fabric, then the color to the snow. Either wetted or dry powder.
Add the color and soda ash powder atop the fabric, then the snow. Using ice cubes works a little better for this option.
Add as I write in the post and also add dye to the snow. I would add much less powder atop the fabric.
Every dyer finds the way that works best for them, it will all look differently. All just as good.
]]>
FABRIC |
¼ yard |
½ yard |
1 yard |
pale |
|||
med |
|||
dark |
|||
water |
2 c |
1 qt |
2 qt |
salt |
½ Tbl |
1 Tbl |
2 Tbl |
s.ash |
⅛ tsp |
¼ tsp |
½ tsp |
w. softener |
⅛ tsp |
¼ tsp |
½ tsp |
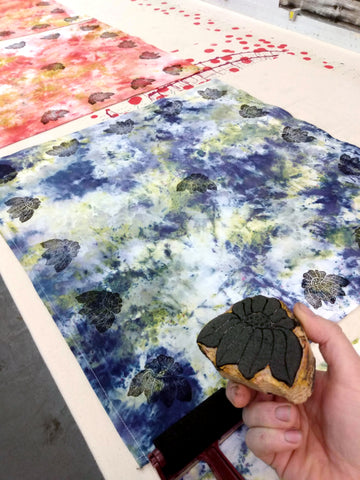
All over the world plants that contain magical indigo grow. There are 3 main varieties that have proven to make the best (maybe 4 if you count woad, which I do) blue dye we know and love. Early civilizations in Asia, Africa, Europe, Central and South Americas that have harnessed the power of the great color, have figured out their own natural ways to dye with it. That isn't easy and I love thinking "how did they figure that out?" Indigo on its own will Not dye your natural fabrics. It needs to be made in an alkaline solution vat and you need to "reduce" it, meaning you take the oxygen away from the compound that is "indigo." And that's not even straight from the plant! To get dye from the plant, it's a whole Other process. But this week let's focus on getting that dye to bind to your natural fiber textile, this time using henna (or heena) powder.
This week's post is to pair with my newest version of my INDIGO KITS. A great gift idea, I think, when paired with a few items to dye!
My kits come in 3 versions of reducing agent (henna, iron, fructose) and two sizes (small/light, darker/large). Though because of the world demand for large canning jars, I do have to reimagine the larger option. In the kit you get a glass jar, marbles, calcium hydroxide, henna (or fructose, or iron), and indigofera tinctoria which hails from India. The kit comes with instructions on the "jar method" and direct to pot. The jar method is fun to watch the magic happening, or if you want to prep a few days ahead of your actual dyeing day. This post is direct to pot method which I suggest for the larger size kits, and you sort of out grow the jar method the more dyeing you do.
This is the main Recipe by Weights that I keep in my dye journal and adjust as needed.
75g Indigo
150g Henna
50g Lime ( Calcium Hydroxide)
As long as you stay in those rations, you can change the amount of blue that you need. If you only have a few tiny pieces and a small container, you don't need much. A large container and tons to dye, you can go much bigger. Especially if you would like to keep that vat going for a while. The Small Henna Kit comes with 28g indigo, the Large 113.5g.
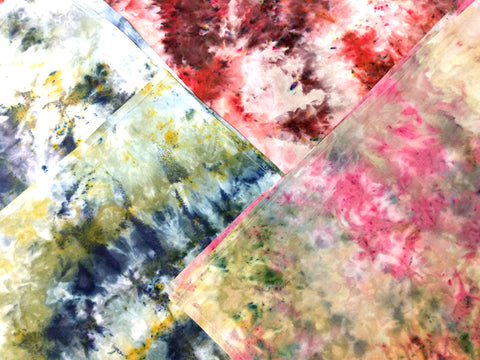
For this demo I only used 14g Indigo, 28g henna, and 9.3g hydrated lime so you can see the color I get and judge for yourself which size kit or recipe you want to go with.
Start by picking a stainless steel or ceramic coated pot that you know you're committing to being your indigo pot. It can be cleaned (not easily), but when dyeing fabric, you don't want to use a pot you'll be cooking food in. Designate and separate your food pots and dyeing pot. And make sure you have a lid for it. A cut piece of thick plastic is also recommended (explained further below).
(but just look how gross)
Get the water in your pot up to temperature. You should be about 140-160°F when mixing your ingredients, and while dyeing you can go lower to 110°F. You will notice it won't dye properly at anything lower. The trick with indigo vats is to balance everything, or it won't be bonding to the fiber. While the pot heats up, prepare your ingredients.
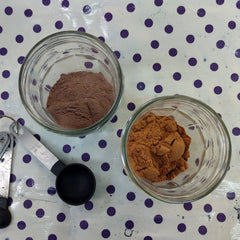
You indigo needs to be "hydrated." If you just throw the powder in, it will just float there, because it's Actually not soluble in water! I know. What? That's where the marbles come in. Now my indigo powder is fairly fine, so you probably don't even need them but better safe than sorry. I will boil some water in a kettle and let it sit a bit to get down to 140ish, too hot and the color can scorch. Place the powder in the jar, drop in the marbles and carefully pour a little warm water over, stopping every now and then to let the powder settle. Placing the lid on for a minute can help, the moisture building up and settling the indigo down. Roll the marbles around, and help them out with a chopstick or similar. The consistency of the indigo should be between a pudding and thick soup. You should see any more powder, which will pop up in the bubbles.
The henna powder is Also pretty insoluble, so repeat the above. However the water doesn't need to be as hot, you don't necessarily need the marbles, and the consistency should be a bit thicker.
The lime should Not be watered down. Calcium hydroxide is your alkaline, and while it is natural and safe to use, caution Needs to be taken when handling it. It is a super fine powder and wafts into the air and it can burn your throat and eyes. Wearing goggles and a respirator when handling it is recommended.
Now truthfully, I have added the three ingredients in different orders. For me the different vat types have more "convenient" maneuvers, but I've not noticed it making a huge difference. Above everything else, add ingredients carefully and cautiously. Remember you are trying to remove the oxygen from this situation, so add each part carefully to avoid bubbles.
So let's commit to the same order as the ingredients being mentioned. First we add the indigo to the pot. I tip the jar to the surface, so that as I pour the water from the pot enters the jar to help every last drop out....Let those marbles fall in to.
Then add in that "blop" of henna in the same manner. You can stir, but no need to at this point.
Now the lime is trickiest because it tends to Fly Everywhere. (Put on your mask, especially in a small space. Make kids and asthmatic people leave the room). And hear me out. Just pour it quickly right on top. Like head over heels let it plop right on top. You then stir the whole thing very very slowly to start and gain momentum only once the lime is sucked into the vat.
This avoids all the fly away. If you ever so carefully let it trickle into the vat, the dust goes all over the place. I stir with a small PVC pipe or an old broom handle. You do Not want to use a spoon and it causes too many bubbles.
You do need a good momentum going and to stir for about 2 minutes. Listen to those marbles! I love this sound! It also helps get that useful sludge up off the bottom. You want the ingredients to meld with each other. You might start to see a greenish tone start to work its way into the vat. Now pause with your stirring stick motionless in the vat and get ready. Carefully move the stick to the outer edge of the pot. Stop. Slowly move in the opposite direction of the whirlpool, hugging the outer edge of the pot. One time around, maybe twice if your whirlpool is still spinning. What you are doing is slowly stopping the motion while grabbing all the bubbles that might be hugging the outer edge of the pot. This swirls the bubbles and any undissolved indigo up to the top and center of your vat to create what's called the "flower." Cover the pot and let it sit on low heat to keep it between 110-130°. While the vat finds itself, which will most likely be an hour, go and prep your fabric.
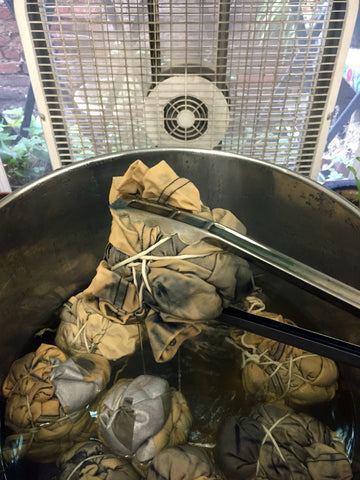
You may have already bundled or bound your pieces, but here's the time to soak them in water. Warm to match the temperature of the vat. Thin fabrics will only need a few minutes, but thicker fabrics can sit in water for up to an hour (or over-night). Once soaked, wring out as much water as you can before dipping them.
Test your vat before you start dyeing your pieces to check it's working properly. If it comes out green, and turns blue in the air? We're good to go!
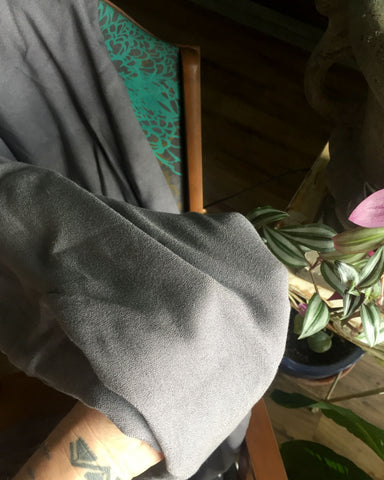
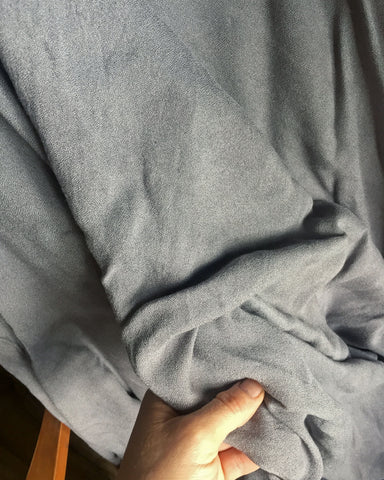
Vat dipping should be done cautiously to keep those bubbles at bay and oxygen out. Dip your saturated item and make sure it sits below the surface the entire time. You should dip your pieces about 2-5 minutes at a time. But larger pieces that are folded high can be left longer. I would say up to 30 minutes before it's just not doing anything anymore. Carefully bring it out the side of the vat, over a dish to collect the drippings, wring it out over this dish, then set aside to oxidize. Your deepest shades don't come with time In the vat, but how many times it is dipped then bonds again with oxygen. You'll watch your greenish item turn bluer and bluer. You'll then dip it again and repeat. Speed up the oxidation and see a truer representation of the blue you have, by dipping the piece in water and wringing it out between dips. (An absolute Must when dyeing with the iron reduction vat).
Dip, then oxidize. Dip, then oxidize. The more times you do this the deeper the blue. But it will also have a limit depending on how big your vat is. Even though I dip my pieces a few times, they will still be a fairly light shade because I only used 14g of indigo here. But lighter shades are just as desirable and harder to achieve than your deepest blues. Your blue will be Much lighter when washed and dried, so if you like the blue that it is, dip it a few more times.
Rinse your final pieces in cold water thoroughly. Then unbundle them and let them oxidize more if you see any green left. You can rise again but I usually don't. I go straight to my acid bath. This can be white vinegar but the kit will come with citric acid. Dissolve in warm water and soak all your items for 15-30 minutes. Wring them out. Then prepare a Very hot soaking bath. The water should be about 130-150° and you'll leave them there for about an hour. Then a wash in hot soapy water. And a final rinse in cold water.
You can put your vat to sleep in there's still indigo left, and it's still green! Return the vat that dripped into your dish. Take a thick piece of plastic and push it to the surface of the vat and put the lid on it. I have a silicon cooking lid that does the trick! I don't cook, so this is it's purpose now. Keeping that oxygen outta there!
Have fun! And come join me in a class for More info and help with indigo!
]]>Now there are a few ways that you'll find "color remover" or "decolorant," however it's basically going to be a mix made from Sodium Hydrosulfite (Hydro) or Thiourea Dioxide (Thiox). Both chemicals are the same you would use to make up a vat of indigo, acting as the reducing agent.
Jacquard makes a single packet you can try out on a small scale and a bottle that will anti-dye about 1/2lb of fabric, with all instructions on packaging. I'm going to show you how to use the bulk materials using both Thiox and Hydro.
The recipes for both Thiox and Hydro for 1 pound of fabric to weight are the same, but the physical amounts are different because Thiox is much heavier. You add 3-5% of Thiox or Hydro to WOF (weight of fiber) and add the same amount of soda ash. So simpler:
For 1lb of natural fabric, add 10 grams of Thiox/Hydro and 10 grams of soda ash. Which is about 2.5 tsp Thiox and 2 tablespoon Soda Ash but 2 tablespoon Hydro and 2 Soda Ash Soda Ash. Now these proportions are pretty loose, and adding slightly more can remove a bit more color, so experimentation is welcome. However be aware that sometimes the color Will Not remove. I depends on what dye the piece was originally dyed with. The same color may look differently item to item, as you'll see in the lonely tank top that I anti-dyed here.
Adding a little glycerin or synthrapol to your Hydro based dye pot, say a 1/2 tsp, I have seen suggested and attempted myself a couple of times, but I really don't think it's necessary when using in shibori or tie dye techniques. It would be more helpful when removing all the color as it helps to smooth everything out.
Have white vinegar on hand. You'll need a neutralizing bath for washing, but good to have pre-made just in case.
1. Weight your fabric. I've simply bound these black tshirts that have been sitting in my sale bin to give them a new look. All I did was bunch each one in my hands and then wrapped them with cotton cord. Don't use rubberbands, because you'll be heating the pot up and they might break.
Iron sulfate, or ferrous sulfate, is used in natural dyeing as a "saddener," as explained in last week's post, or as a mordant in preparing fiber to accept the dye. In this post I'll show how to easily make your own iron liquor and a fun and easy dye project that can be very satisfying.
As explained in last week's post, you can buy the powder or make your own "iron juice" easy as 1-2-3.
1. Pick a jar that you that you will let go to the process. You probably won't be using it again once you've committed it to making iron juice. Make sure the lid that you choose isn't metal (it will rust) and that it can open it. If you don't air the jar, it will explode. Not like "Boom!" but air will want to escape and it will make a mess, dripping all over the place. Notice the lid I chose that has the mouth spout. I close it, and every once in a while I heard it "Pop' open. I then go and shut it.
2. Grab some rusted objects! Once you start looking for them, you'll see them everywhere. You can use "fresh" metal but sometimes it's hard to tell if the metal is stainless or not. If it's already rusted, you know! Make sure you can fit them into the jar and if you're concerned about staining your hands, wear rubber gloves when you're collecting. Wearing gloves is also recommended for avoiding cuts.
3. Put your metal pieces in the jar. Fill halfway with water. I use tap here in NYC, but using well water or river water can have slight different affect. Then fill the rest with white vinegar. Then wait! That's it!
This is my jar that at this point is 3 years of age.
You keep your jar indefinitely! This particular jar has been around the block as they say. But sadly my first jar was destroyed by my clumsiness. I love using glass but there is the possibility of breaking... I had used a regular Ball jar lid, which is metal. It rusted itself to the jar, and while I struggled to open it, it fell, and stained the floor ForEver. Learn from my mistakes...
Sneak peek inside the magic :-)
This rusty pulley I found on the street one day wasn't how I started this jar of goodness, but it has made my iron juice really potent!
The strength on your iron juice depends on the amount of rusty objects and age of your jar. You should see murky waters within the month if you started with already rusted pieces. As you use the mixture add equal parts vinegar water to fill the jar. Add rusted objects as the ones in your jar break down.
Use to mordant fiber for dyeing Or staining wood!
Grab some rusty bits (as i like to call them) and fabric. Maybe a soiled and satined piece of clothing?
Mix 50% water with 50% white vinegar. You can either put it in a spray bottle or have a bucket or dish of it.
Spray or dip the fabric with the vinegar mixture. Place the rusty bits onto the fiber. Roll it up. Either lengthwise or all bundled up. Then secure it wade with rubber bands or cotton cord. You can spray or dip in more if you feel it needs it. The fabric should be completely saturated.
Then bag it up and wait a few days. Now this timing depends on how rusty the pieces are, the thickness of the fiber, and the temperature. I find in the winter the action is a bit slower. The thicker the fabric the longer it will take to stain/dye it. Just make sure it sealed and stays wet. I would say 2-3 days is a good length of time for thin to medium weight fiber. You can check on it, add more moisture, and put back to bed if you feel it needs more time. Too much time and you may see thinner fabrics breaking down.
Now this isn't an archival process. If you attempt on a really fine silk, you may see the fabric break down over time. So do keep that in mind.
Washing! There is some debate on the washing process. You'll see that salt water is sometimes used, but I have not found a great answer to why. My theory is that because salt water accelerates rusting, it may help rust pieces to fall off the fiber. You will see that in some areas pieces will be stuck to the fabric. This is my wash process:
After I remove the rusty bits and Save Them (use them until the fall apart). Make sure the rusty bits dry completely before you store them or they will be one big ball of rusted metal. I make a salty water bucket. About 1 cup to 5 gallons of water. I soak the item in the bucket for 15-1 hour. Then I really scrub that item in this bucket to try and get all the residual rust off the fabric because that will break down the fiber. Then I'll wash fabric in synthrapol and a sprinkle of soda ash (baking soda will do in pinch). I want to neutralize the acid in the fiber that the vinegar added. Then a final rinse wash.
These are pillows I bundle dyed with rusted barbed wire I found in the woods. The metal was so old that the trees had grown over the wire.
And this piece I dyed with rusty squares I found at a construction site after initially dyeing with cochineal!
Experiment! Have fun! Try dyeing fabric outside on top of rusty items! Artist Tanya Aguiñiga dyes directly from the rusted wall at the US/Mexico border. Placing fabric on rusted surface, spraying with vinegar, and applying pressure can produce beautiful affect.
]]>(Sorry there's a void of pictures for this part of the process. Imagine white fabric being added to large pot full of dye :-) )
MYROBALAN is my favorite dye to get greys to black on cellulose fabrics.
CUTCH a second best.
MARIGOLDS with iron in minor amounts will produce lovely olive green.
MADDER doesn't get you grey or black, but a lovely dark maroon shade ca be achieved with a tiny bit of iron.
]]>Hi Karin, Hi Kyle!
Love my bleach dye sweatshirts!
Question: have you ever bleach dyed with the shibori arashi PVC pipe method? If so, good or bad experience? Any tips?
Shibori Resist techniques have been in use for 1300 years and break down into a few broader categories:
“In shibori there is a right and traditional way but there rarely exists a wrong way.”
Comes from the Japanese word Shiboru: to tie, squeeze or wring out. However where ever there is dyeing in the world, there is some sort of traditional resist techniques.
Fabric Prep and Dyeing
Washing After dye treatment is critical. You don't want bleeding, discoloring, and fading
-Rinse in cold water to remove a good amount of indigo before you unbind/unbundle. You can give a quick rinse after too put don't agitate too much.
-Fabric should then be soaked in an acid bath for 15-30 minutes or overnight, to deactivate the reducing agent and it also helps set or “fix” the indigo. (White vinegar 1 cup per gallon bucket, people will say "a couple of glugs per gallon" as well. Citric Acid is about 1 cup per 5 gallons.) If you don't you'll get yellowing and fading.
-Soak in hot hot (130degrees) water for at least one hour or until water is cool. You need to loosen dye particles that haven't adhered.
-Wash in hot water and mild detergent like dove or dr. bronners, but synthrapol highly recommended. It helps with dye bleeding by suspending dye particles.
-Final wash in cold water.
During the life of your piece, continue to wash your piece in cold water and avoid intense, direct sunlight.
Tending the Vat Vats can kept for years if used frequently, cared for, and stored properly. Prereduced vats keep a month maximum, natural vats one year to many. You shouldn’t store a natural vat for more than 6 months unused. You'll smell if it's bad.
Stored vats can be brought back up to temperature if necessary for reducing agent used and then pH tested and adjusted with reducing agent and alkaline.
Disposal of Vat Keep your vat as long as you can, but when ready you should neutralize the lime/hydro before pouring down the drain. Adding vinegar will do the trick but also whisking vat to add air, turning the lime into calcium carbonate aka chalk/limestone, will make it safe enough to compost. (natural vat only)
]]>SCOUR Meaning simply washing, but over a low heat to properly remove any oils and residue.
Soda Ash + Synthrapol for CELLULOSE ½ tsp per lb fabric (1 sq ft med wt)
Synthrapol for PROTEIN (or orvus soap)
*SYNTHRAPOL: Prewashing in Synthrapol helps remove oils, dirt, etc that can cause inconsistent dyes. Synthrapol as the after-wash keeps loose dye particles of dye in suspension so they don't stain other areas of the fabric. It is also pH neutral so it will not alter natural dye colors sensitive to pH change.
MORDANT Few natural dyes bond to your fiber on their own. Mordants are substances which are used to fix the dye to the textile. They also improve the brightness of color, but with some methods, will change the color. The term is derived from the Latin mordere, to bite. The most commonly used mordant is alum, and is considered a neutral mordant as it doesn’t change the color and often enhances. Other mordants are:
SUBSTANTIVE dyes (lichens, walnuts, japanese maple, acorns)
Dye stuffs that are naturally high in tannins, do not need mordants, but definitely benefit when using both. They can also be used as mordants, but will affect your color as they all leave a tan to brown tone.
ADJECTIVE dyes need a mordant to bond with fibers. The mordant enters the fiber, the dye follows and bonds
Metal Mordants (should not be inhaled!) Copper, Tin, Chrome have been used but used less and less as they are toxic. If using these in your method use caution! Masks, gloves, glasses, and proper ventilation should be used. TIN; (harsh on wool, toxic)
Experiment; boil a tin can for at least one hour, and use the water bath as your mordant.
ALUM Recommended for protein fibers. Aluminum Sulfate has been used for years, will brighten colors, but not alter most, and great will plant based dyes. You can play using it as an after bath for some dyes changing the color as with cochineal. It’s used in pickling and fertilizer. It’s easy to get and safe. Still use caution when boiling, making sure not to inhale fumes.
To mordant the fabric (or fiber or yarn) simmer together with 1.75 tsp Alum and 1 tsp Cream of Tartar per pound of fabric for 1 hour. Allow the fabric to cool in the solution. Squeeze out excess water from material. Rinse in warm water. Some leave in solution. You can allow the fabric to dry if you want to stockpile some pre-mordanted material, but you want to use it in about a month as over time the alum can degrade the fabric.
ALUMINUM ACETATE Buy or Make (Mix: 1 part calcium acetate or (sodium acetate) with 1 part Alum)
Recommended for cellulose fibers only. This will benefit from pretreating with a tannin dye stuff as well.
For this mordant you do not “cook” the fibre. For this reason a plastic container may be used for mordanting.
Measurements per 1lb // 6Tbl (3 alum, 3 acetate) // Chalk 2Tbl OR Bran 5.6 Tbl = 1/3c
1) Measure aluminum acetate at 8% WOF, dissolve in hot water. Top up the kettle with enough hot tap water 38 - 50ºC (100 - 120 ºF) to fully cover the fibre when added.
2) Add wet fibre (recommended to have been already mordanted with tannin).
3) Let fibre sit for 1 - 2 hours stirring from time to time. Keep the bucket covered and wrapped so that it retains its heat.
4) Remove fibre and hang to dry
*Aluminum acetate must be fixed to the fibre prior to dyeing. In some cultures this is known as “dunging” as cow dung is used. Dung is high in phosphates, but you may also use wheat bran or calcium carbonate (our preferred choice).
5) Chalk* (fix) the fibre. Dissolve 50 g of chalk (calcium carbonate) in 5 litres of warm water. Dip fibre into this solution. Fully wet the fibre, wring out and proceed to dyeing. If using wheat bran, mix 100 g of wheat bran in 5 litres of warm water, fully wet the fibre, wring out and proceed to dyeing.
IRON Ferrous Sulfate use as a mordant and also a color modifier. You can buy the powder or create your own iron acetate. Historically mud may have been used in dyeing as it’s high in iron. Iron “saddens” colors so keep that in mind when choosing this method. It can also make wool fiber brittle. Using a softener after dyeing is advised.
-Boil water in a stainless steel pot, add your “iron water,” introduce wet fabric, simmer for 15 min. Allow to cool. Strain and wring out fabric. Never boil iron and inhale fumes!
-To alter you dye bath colors, Always dissolve iron separately. Add a very small amount to bath, and then introduce fabric with either mordanting, dyeing, or modifying.
-Making an “Iron liquor or water” In the jar, place the rusty iron objects. Add 2 parts water to 1 part vinegar to the jar, filling the jar to cover the iron objects. Put the lid on the jar and seal tight. The water will turn to a rusty-orange color in 1 to 2 weeks. You can let your iron mordant liquor sit for as long as you like. Add to it to keep it going, as you use from it. It’s hard to measure the amount of iron it holds, but I would say ½ tsp of powder may be equivalent to 1 Tbl of liquor.
SOY Greatly recommended for cellulose fibers. You trick the fiber to reacting to the dye like a protein fiber. Soy coated fiber should be used within two weeks. It further polymerizes becoming insoluble in water. A half cup of dries soy beans goes a long way. You can make enough for 5 yds of fabric. It is Not a mordant but a binder and more used in painting with pigments on fiber and paper. The color is held to the soy, not the fiber so when you wash a garment it will fade with time.
-Soak soybeans for about 8 hours. Strain and rinse.
-Blend soaked beans in full blender of water for 4 minutes and strain and discard the liquid.
-Blend soybean pulp in blender of water again for 4 minutes strain and save the liquid. Discard the pulp.
-Add water to your soymilk so it looks like skim milk. Store the milk in fridge for at the Most 3 days, but using as quickly as possible is necessary.
-Soak your fiber for at least an hour. I always soak overnight. Wring out the soy lightly. Lay fiber as flat as possible and store, and let it dry. The trick is to not get streaks as it dries, which you can get if you hang it. Some will paint on the fabric with a brush and dry flat. Sometimes I leave it in the fridge overnight and then let it dry. A double dip is a great idea too. You must allow to dry between applications.
This process is really hard to time out and requires a lot of experimentation per fiber. Experiment! You should let the fabric sit for at least 3 days to work it's magic, but again, not longer than 2 weeks.
Symplocos pdf from Maiwa for Bebali Foundation
]]>Pre-Reduced Indigo "C16H10N2O2" Pre-reduced indigo is fermented, chemically altered and air dried to form crystals that dissolve in water quickly. It still has to be chemically altered further to bond to fibers, but in this form it is easier to maintain and can last a while, but not as long as a traditional vat. Benefits to pre-reduced indigo vats are shorter dips, consistent blues, easier to start, quicker to start. No need to check pH balance, and allows you to use soda ash instead of lye. There is a shorter life to the vat, but I have had successful dips for a month if vat is properly tended to. Jacquard brand, which I use in my beginner shibori classes, is 60% pre-reduced indigo and freeze dried, dissolving faster, and still retaining the other unique properties of indigo. However IT IS NOT NATURAL, and don't believe people that say it is. The chemical compound is exactly the same as real natural indigo, but it is a petroleum byproduct.
Preparing a Pre-Reduced Vat (5 gallon) The ideal container is round, made of hard plastic, glass, stainless steel, or enamel. Container should provide the most room to dye without touching the bottom while limiting surface area exposed to air. When storing, cover to reduce contact to oxygen.
Pre-Reduced Vat Recipe
(Always use suggested recipe from indigo source, and then alter as you see fit. Mixing should be some in a well ventilated area and if not with ventilator mask at least a clothe face covering. Children and those sensitive to chemicals or breathing issues should not be in the area when missing occurs.)
*Start with recommended and alter as needed to achieve desired blues. Keep the proportions as best you can. Most dye recipes will benefit from weight measurements.
Shibori Resist techniques have been in use for 1300 years and break down into a few broader categories:
“In shibori there is a right and traditional way but there rarely exists a wrong way.”
Comes from the Japanese word Shiboru: to tie, squeeze or wring out.
More details coming soon...Proper dipping technique and aftercare HERE.
Prereduced Indigo kit shown available here. You can also purchase the materials separately.
Natural indigo dye kit here. A different recipe is needed, which you are sent with purchase of the kit.
]]>
Nui Shibori (Stitching Dye Resist) can be very time consuming but the results are worth it. The trick is to let the work be a form of meditation. Stitching along can be a welcome calm in a hectic day, or bide the time while traveling. When getting ready for trip, I usually prepare a handful of pieces by sketching the designs on the fabric beforehand and packing them in my "boredom bag" so I can work as I go.
Picking the right tools for the job is essential. You want to use a heavy weight thread that will easy to pull through the fiber you are working with. You do not want something so thick that it will rip the fabric, or too thin causing it to snap while sewing and tightening. I use this upholstery thread for most projects because it's strong, thin, and a little slippery. Button thread will work well with most projects that is easy to find in most notion shops. Same reasoning goes when picking your needle type. You want a good sharp point, an eye that can hold the thickness of your thread, and not too big that it will rip the fabric as you stitch. I use embroidery needles, which you can choose various points, gauges, and lengths to suit your fabric.
Draw out your design first. As you start to stitch the fabric will buckle and it will be impossible to free-hand stitch a design. Make sure you choose a marking tool that will wash off when you are finished dyeing but not brush away while you're sewing. I have been really into these pencils, after watching my chalk lines disappear from some work as I stitch larger pieces.
Showing students this particular knot has thrown some of them off a bit. It's basically a french knot. Pull out a length of thread the size of your marked line add 5 inches, and then double that length. You will be stitching with a double strand. Insert the thread in the eye of the needle and meet the ends of the two tails. Pull the needle to looped end and let the thread straighten. Put the needle on top of the two tails and hold in your dominate hand, pinched between your fingers. Let the tail stick out and with the other side of thread wrap counter clockwise around the needles point 5-7 times (depending on how big you need knot compared to fabric thickness). Pinch all the thread around the needle and hold. Push the eye of the needle up, and pull the point of the needle up and through the wrapped thread, remembering to pinch the whole time your fingers. With pinched fingers pull the full length of the doubled thread through until you reach the end, which will result in a large knot at the end of your doubled strand. If done correctly.
Stitch on a "stopper" or "bumper" and your ready to start stitching! I cut up small pieces of old clothing tags but a small piece of tightly woven fabric, jersey, or felt will do. You just want to add a small piece of something to ensure that thread won't pull through the fabric when pulling your threads tight or while dyeing. In some cases this is not a necessary step. Like when the design is a short distance or the knot is much much bigger then the weave of the fabric. My opinion is, better safe than sorry.
Start to stitch just before the edge, making sure it's not too close and cause the end fibers to fray. Essentially you are going up and down, but you can speed that straight stitch along by holding fabric and pushing the needle up and down, down the line marked. Take note is lines cross each other in your design, and strategically decide how to place your stitch. You generally want to cross them, not go through the same hole as this risks ripping the fiber.
When you get to the end of a line, add a small bit of fabric of your choice again, open the two strands. With the two tails make an overhand knot, but loop the one tail twice. Looping two times around locks in the stitch without leaving a permanent knot. This way your stitch doesn't pull through and saves your work, and you can easy undo when your ready to pull at the end. Leave flat until you've stitched the whole piece. It's better to finish all your sewing before pulling because you won't be able to see or get to all of your design.
When all stitching is complete, you can then start to pull. Properly pulling your stitching is the most important part of all your work so far. If it is not tight enough, your resists won't be crisp. Taking the time to secure all your hard long work is essential. Start with the short distance lengths of your design, and work up to the longest lengths. The trick is to pull as tight as possible without snapping the threads, while watching that the fabric doesn't get stuck in the stitches. So as you pull, smooth out the fabric to the left and right of the stitch by tugging slightly. The lose overhand knot will help to keep your fabric from loosening as you tighten, just keep cinching it tighter as you go. When you have gotten as tight as you can, close the knot by adding a few overhand knots. But you still have the make that knot bigger. Usually I just make it bigger and bigger by pinching the knot I have with my nail, taking the tail of the thread around and between the "stopper" and my nail and creating another knot sneaking the tail through the opening, over and over. You'll notice the fabric gets tighten and tighten this way, leaving you with a tighter resist. you can also try making another french right at the base, but that demo is for another time. You can snip some of your tails away, but making sure you leave at least 6 inches.
Now onto dyeing! I am partial to indigo vat dyeing but this also works really well with fiber reactive dyeing. When your dye pot has to be high heat or boiling for long period of time as in natural, basic or polyester dyeing , the resist doesn't hold as well but you will get patterning for sure. Just be Extra cautious and thorough with your thread tensions.
Quick How To Indigo: Soak fabric in water, Wring out as much as possible, Submerge in vat for proper length of time depending on style of vat, Remove and let oxidize, Repeat until desired blue is achieved.
Quick How To Fiber Reactive Dye, Cellulose: PreSoak Fabric in Soda Ash Water, Wet dye, Pour over fabric or Squirt onto fabric, Batch for 1hour-24 hours.
When dyeing is complete, rinse your fabric well as it's still stitched. It won't run clear, but your resist will be better if you rinse some dye out before you remove all your stitches. And now the satisfying part! Pull your 6 inch tails, and using snips, scissors, or a seam ripper snip just the knot at the end of each line your created. The fabric will Pop open! Continue to pull the fabric apart revealing your design! Remove all the threads and wash your piece in hot soapy water, twice if necessary, cold water rinse.
Voila!
To watch the full video go HERE
]]>(UPDATES BELOW and marked*) Definitely a double entendre. Something to do while you remain in doors, and help out your fellow man. I reshared another makers instagram post about making your own masks at home to help out while being stuck inside. Because I have no reference materials myself, I thought it may be helpful to compile a few helpful links that we found out there. Definitely reach out if you found one you like more! I'll keep adding.
*CDC https://www.cdc.gov/coronavirus/2019-ncov/prevent-getting-sick/diy-cloth-face-coverings.html
*When making masks for hospitals check in with them to see what they prefer and don't just send them in.
*FU Mask Pattern I added a 13" elastic to the top for around head and 2.5' of twill cord for around the neck. Cutting up an old tshirt for straps is helpful tip for those without supplies.
*Instagram helpful video tutorial. My own personal modifications; My fabric square is 8.5"x10" and I used a 42" cord looped all the way through instead of elastic. The cord rests on top of your head and ties down at the back of neck.
*No Sew Mask: http://blog.japanesecreations.com/no-sew-face-mask-with-han…
This is a Great post about different fabrics you can use and their effectiveness. Go here first to determine what you have lying around that is the best option; https://smartairfilters.com/en/blog/best-materials-make-diy-face-mask-virus/?fbclid=IwAR2wAgblHodWLjN8LHDQuf8DTJsAy4edi3lWxKuHzwMcN9rKanlPnYfqYTQ
This Instructables post has two mask options, downloadable links and pictures at important steps, just scroll down a bit. Also, child sizes! https://www.instructables.com/id/DIY-Cloth-Face-Mask/?fbclid=IwAR1bfqBvoh1XDUYAPbTbNAMSOknzAXQbBWaXvQv4utsSRpq-F3gYW9XwKvI
Here's a pdf download for the FU Mask And a youtube video that's very helpful; https://freesewing.org/blog/facemask-frenzy/?fbclid=IwAR1P8cz5V-Z1t-Raztq7cxtL4DsVTAgLCkFdYnabR-FolZ2RGhP7xkH5hYA
But where to send them? I had heard that Providence hospitals sent a call out for makers to make them. I would probably look locally to see who needs them in your area specifically. Any suggestions from readers who know who needs them? I will add below here;
UPDATE ONE:
Gotham City Quilts "This probably is obvious, but sewn masks are not as effective as medical-grade masks like the N95 masks which stop 97% of virus-sized particles (the ones we need to demand our government provide).
From the link: Data shows that DIY masks made with a single layer of cotton clothing or a tea towel can remove around 50-60% of virus-sized particles. This means they perform worse than surgical masks and FFP2 (N95) masks. Wearing the homemade masks for 3 hours had no significant effect on the filtration efficiency."
We are in contact with a nurse at Mount Sinai West in NYC who is requesting masks. They can be mailed to:
Mount Sinai West
3G Rehab Unit
ATTN: Sonia Mains
1000 10th Ave
New York, NY 10019
And here are some other drives we've found that you can donate to:
UPDATE TWO:
Masks needed but also gowns! https://docs.google.com/document/d/1SGh4GStsBs3gYS_tbB017lVFNSfC1aVbbUiCtN9fZlA/edit
Open Jar Studios is building a team of sewers. If you down't have a machine they can even help with that! Go to their page for more info and sign up.
https://www.openjarstudios.com/broadwayrelief
UPDATE THREE:
UPDATE FOUR:
NYC SEWING CALL
]]>
You collect black walnuts aka juglans nigra, in eastern North America in late fall/early winter. I live in Brooklyn NYC, so harvesting dye stuff is possible but tricky. I certainly don’t get the haul that someone out in an area with “real” nature does. So this was a great surprise.
When I got the shopping bag full of them, I couldn’t get to it right away, knowing it would be a chunk of time to get into all of them. The bag was full but they were in various stages of decay. The organizer of Rocks and Salt’s event had grabbed Bags of them from her yard and did a call out to anyone that wanted them. They are great friends and instantly thought of me.
When you get your black walnuts, you should tend to them as soon as possible. They rot and mold fairly quickly, especially if they’ve been rotting a bit on the ground. Also bugs. Little worms love these things, so be prepared to remove some your collection. The super saturated dye comes from the hulls, so you have to crack and remove the outer soft shell. You can use a mallet or rock, but be careful and not be too aggressive or the dye will splash everywhere and it is super saturated and long lasting. WEAR GLOVES when collecting and handling, no joke! You’re hands will be stained forEver. My gloves got holes in the the thumbs while I was breaking the husks apart…my hands were brown for longer than a Month! Not exaggerating. Stained hands for a MONTH.
Once you separate the hulls, you can dye with them immediately. They are a substantive dye which means you don’t need to prepare your fabric with a mordant. (The walnuts and husks in the center I saved to experiment with later, check back.) Since I had so much of it I wanted to be able to store it for later use, so I left them to dry out on a table for a few days. So they didn’t mold, I came and moved around the bits twice a day.
Once they were fully dried, I used this amazing coffee grinder to pulverize the bits. One; so that they fit better in a jar. Two; so I could measure them easier, and the dye would be extracted in shorter amount of time. Three; I like to bundle dye with the grounds! You can use them as chunks too. Fresh is always best, if you just want to throw the hulls in a pot and dye with them immediately.
When ready to make dye bath, simmer your hulls in a small-medium sized stainless steel pot for at least an hour (I usually simmer, let it sit overnight, then simmer again), and then pour the dye through a strainer or colander to get all the bits out. (It is Impossible to clean your fabric when it’s covered in dye stuff.)
You can store extracted dye for later use in fridge or add your fabric immediately. You can even use your dye to draw and paint with by making a really saturated brew.
If you’re fabric is ready to be dyed (always scour your fabric), bring a large stainless steal pot, half filled with water to boil, then lower to 180 degrees. The pot should be big enough for the fabric you are dyeing. You want the fabric to have enough room to move around without folding over on itself and bunching up, causing dark or lighter spots. When water is 180, add your strained, saturated, dye mixture into the pot and stir. Make sure your fabric is wet then wrung out, as you never should add dry fabric to a dye pot. Unbunch your fabric and slowly add in to the pot. Keep at 180 for an hour, stirring every 5 minutes, and then leave it in the pot over night. I even check on it, stirring, when I pass by it during that time.
Rinse in cool water. Wash in hot soapy water, preferably synthrapol, Then rinse until water runs clear. For the life of the piece, any naturally dyed piece should be washed in cold water to preserve the color.
I had 5 yards of prewashed linen. Because my pot is a little too small for that amount of fabric I heat the dye and pour over the fabric in a 5-10 gallon tub. Rather then simmering the fabric, I let it sit for a week, tending to it a few times a day. You need to stir and move your fabric around so it doesn’t dye spotted and inconsistently.
After it sat for a good amount of time I removed the fabric, twisting as much of the dye out as possible, but not letting dry. Damp, I folded the fabric back and forth and then rolled it up, in a sudo-shibori style. With fabric set aside, I brought the dye bath back to 180 degrees and added 3 Tablespoons of iron powder. I placed the fabric back in the tub and then carefully poured the iron’ed dye bath so that it covered half the rolled fabric, and let it sit for 2 days.
After dyeing and washing, I then silkscreen my the yardage with water based textile ink. Each color/image is a step in the print process. Once the ink is dry it needs to be heat set or “cured” so that the ink bonds to the fiber and is washable.
Cut it up, and sew it. Only 4 made per 5 yards created.
This skirt was one of a kind and sold! But see below, I may have a cowl neck top left in my online shop!
Fun Fact: Black walnuts are a natural source of iodine and great for your thyroid, antifungal, and antiparasitic. Here’s a link to more info on health benefits and making black walnut tincture.
]]>Here’s a quick lovely resist dye pattern that happens to be one of my favorites!
I usually teach this one in my “Part 2” or Intermediate Shibori workshop. (All my shibori workshops, and others, are listed HERE) After teaching a bunch of really tough techniques, I love to show this one as a bit of relief, calling it a "take it easy technique". I have not seen it in any traditional Japanese shibori books, only referred to as “Honeycomb” pattern over here. But culturally techniques pop up all over the place. There are many traditional shibori techniques using rope, so I figure it’s a simplified play on some of those styles. It’s super fun, easy, and Beautiful.
*If dyeing with procion reactive dye or indigo, you Must use natural fiber textile. Synthetics will Not work.
So to start, you’ll need a rope. The pattern is determined by the diameter of the rope and the thickness and size of the fabric. I like to use natural fiber elements as much as possible, so cotton cord is my go to. I like using cotton cording (usually used for piping in sewing projects), because it soaks up the dye too, allowing the dye to penetrate from the inside. Look around, see what you have around. You can pretty much use anything as long as it stays secure when knotted and wet. For larger pieces of fabric I find it’s easier to get an all over, even dyed piece when you use a larger diameter cord or rope.
Next lay out your fabric, in order to start rolling it over the cord/rope. You have a few options, all leaving a different look. Experiment! Fold in half, lay straight, on the diagonal…all great!
You can either start with a damp fabric (make sure to squeeze out as much water as possible though) or a dry fabric (you’ll see below it may depend on your dye preference). You always need to dye with a wetted fabric, but choosing to soak before or after you wrap you fabric will give you slightly different looks. I like to soak after, because it can be harder to slide it over the rope when your fabric is wet. However some fabrics like silk can be harder to rangle, and easier when damp.
Slowly and evenly roll the fabric over the cord.
Once all the way around, you’ll meet the end making sure the flaps of fabric are tucked to the inside. Pinch ends together in one hand, while holding the tails of the cord/rope. Then pull.
When fabric is pushed all to one side, tie the rope together so it’s secure but can easily taken apart after dyeing. I like make half a square knot, then a safety knot.
After it's bound up;
For indigo: You’ll submerge in water before you dye. Squeeze out as much water as possible before you carefully introduce it to your vat. Let sit beneath surface for a few minutes (minimum 2 minutes for pre-reduced, 5 minutes organic). Then carefully lift out of the vat, using the wall of the bucket/pot, to avoid splashing. For darker blues, dip more times. (I’ll update this post with links to future “how to indigo dye” posts.)
For procion dyes: So these dyes need to be “activated” with soda ash. You can either pre soak your fabric before you wrap it up, soak it after it's been wrapped up, or add it to the dye vat. This would be too long a post if I was to “how to” dye in these different methods…here’s a quick link to a few while I write my own post about it. I’ll make one eventually.
Here’s one of my lightweight shawl/scarves. Love that ombre effect on larger pieces!
]]>Hello! It’s been a while….I figured it’s time to start up the ole blog again. This is a lengthy one, and probably the last of its kind. I plan on posting a lot of process and demo content going forward. But here’s a bit of history for you. If you’ve been here since the beginning, Thank You! I started posting in 2009, and decided to keep a lot of the old posts (deleted some, because man digital pics have come a long way). But it’s fun to go back and see how far we’ve come with those cruddy older posts. It’s been quit a journey.
So what’s Better Than Jam? This question, when people ask, still makes me laugh. I usually just say “Right?!” with a smile.
Better Than Jam came into existence around 2006 (I believe?), and began with me, Karin Persan, taking my hand printed textiles and making stuff to sell after graduating college. Accessories mostly, ie handbags, scarves, etc. while living in Chicago. (I had attended SAIC) I needed a name and started to ask people, “Would you rather be better than jam or better than toast?” playing off the old saying “better than jam on toast.” Most people preferred to be compare with toast, and I just did not, do not agree. Confusing? Yeah it doesn’t matter. The name still makes me grin and giggle.
Early 2010, a few years after moving to Brooklyn NYC, I opened up a brick and mortar at 1095 Flushing Ave inside the LOOM building. It featured, not only the works of myself, but also the makers, crafters and designers I met while doing markets and craft shows around the city the first few years of living here. I called it Better Than Jam Handmade Co-Op. I figured if the shop didn’t work out, I could just make the space my studio and showroom and cut off the “handmade co-op.”
There were a handful of reasons I opened the shop. I was tired of the hustle of selling at events each weekend (later learning I’d still have to do them ), I had broken my shoulder and lifting all that gear was too much, I was turning 30 and questioning wtf I was doing with my life (as you do), I figured this was the “next step” of creating a line, and I had just met so many talented people and had a great line up to showcase in my neighborhood (which had no shops besides thrift stores)…. I liked it here and wanted to show us all off!
It was tough. No one was around. I would hold events every month and give away free booze to drive people over to this industrial area. The building was void of other shops at first, so I had to just wait for other business to start opening up. Which they eventually did, and I am so thankful for those early days making friends with other shop owners, customers, and neighborhood folk. I grew out of the first space and expanding to the 1,000 sq ft spot on the corner, refined the business, made more friends, hosted pop up shops on Governors Island and at DeKalb Market, sold at events here and there. Looking back, I can’t believe all that happened, and how much help from friends and family I received (thank you!) I was at the Loom until 2015. It was rough but had its charm and I learned a lot. Though tough, it was sort of dreamy in its crudeness.
Towards the end of my time there, I expected to close up and find something else to do. But thanks to my friends at Tomahawk salon and Pine Box I was given the opportunity to create my dream space.
20 Grattan St was an 4500 sq ft old abandoned warehouse that used to store coffins (fun fact) for the casket manufacturer on this block. Very raw but with a fresh roof and second floor since there hadn’t been one for years. The landlords we’re finishing the second floor how I would like it, cleaning and painting so I can start immediately start building how I wanted, installing all the things we would need for a print studio, and offered a really long lease when no one in NYC seemed to be doing so. I had to grab the deal or it would just pass me by and feared never raise its head again.
So here I am. Grand Re-opening Halloween 2015. Better Than Jam’s STORE & STUDIO. The dream.
If you know me that will seem like sarcasm. But really! It is! It’s not easy, and I am always tired these days, but this is the space I have dreamed of creating. A makers haven. The storefront to showcase the work of our creative community along with the communal workspace to produce and teach our skills to a growing network of makers. And it is growing.
I love going back in these posts when I feel things are moving too slowly. Give myself a pep talk. Look what you’ve done! Look how many people have helped you along the way! There are so many possibilities for the future!
To everyone that has sold here, shopped here, learned here, created here so far…THANK YOU. Can’t wait to see what happens next.
(Since May 2020, the space has downsized and moved to 10 Grattan St. and is the Better Than Jam showroom and studio space only.)
]]>